
Unlock the Mystery: How to Read Tapestry Patterns
Ever felt like tapestry patterns were penned in a secret code? You're in good company.
Peering at those intricate designs, you might think, Is this really for me? It's as if they're speaking a language from another planet. Absolutely normal to feel a bit at sea.
These patterns, with their twists and turns, seem to chuckle at our attempts to decipher them.
But here's the twist: they're not barriers; they're bridges. And cracking that code? It's not reserved for the wizards of the craft world.
Ready to unlock the secrets together? Let's start.
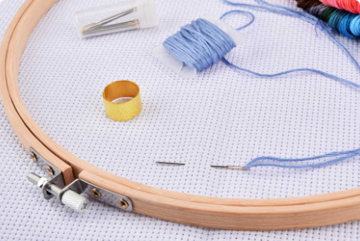
Start Your Tapestry Journey: Unravelling the Basics
Ever looked at tapestry patterns and felt like you were trying to crack the Da Vinci Code? Let’s start with the basics and demystify this art.
Tapestry patterns are a map. They guide your hook and yarn to create something beautiful. The symbols? Think of them as the X marks the spot.
Starting with the regular single – it’s your bread and butter. Whether you’re right or lefthanded, this stitch is where your tapestry journey begins.
Using single stitches, which serve as the basis for patterns and colour changes, creates the foundation of many tapestry projects.
Diving Deeper: Understanding Patterns
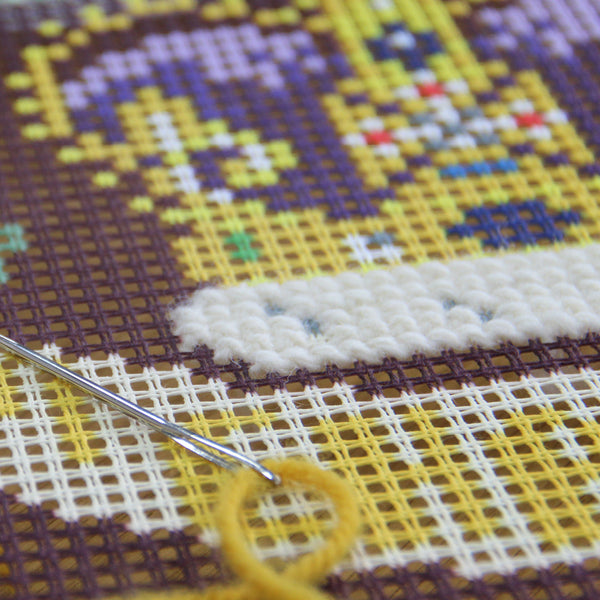
When reading tapestry patterns, you're essentially translating. A tapestry chart is your Rosetta Stone, translating yarn into art. Each symbol corresponds to a specific action.
For example, a dot might mean a single stitch, while an ‘x’ could indicate a double.
Here’s a nugget of wisdom: colour in tapestry isn't just about aesthetics; it’s about technique. Changing colours mid-row? It's like a secret handshake among stitchers.
Imagine you’re laying down bricks of colour with your yarn, switching seamlessly as the pattern dictates.
The trick?
Master the art of carrying yarn along the inside of your work, so it’s ready when you need to switch.
Avoid the Tangles: Overcoming Common Hurdles
Misreading symbols is like missing a turn on a road trip. Suddenly, you’re miles off course. An example? Confusing the front and back (or right and wrong sides) of your work can make your design look inside out.
Always remember, the side facing you as you is the front of your work.
And here's a pro tip: when working in rows, you’ll need to turn your work at the end of each row. This might sound simple, but forgetting to do so can lead to lopsided projects.
Beyond the Basics: Crafting with Intuition
Now, for something you might not expect: intuition plays a massive role in tapestry. Once you’ve got the hang of the basics, start listening to your gut.
Not every detail is always spelled out in written instructions. Sometimes, you’ll need to make a call on which hook to insert into a loop based on what looks right.
Grow Your Craft: Advanced Tapestry Techniques
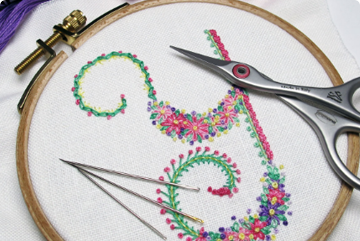
Adding personal touches to your tapestry projects can be a gamechanger. Let’s say you’re comfortable with single and double stitches.
Why not experiment by inserting the hook through different loops on the hook to create varied textures?
Or, if you’re lefthanded, consider how flipping patterns might work better for your style of stitching.
From Pattern to Project: Bringing Designs to Life
Let’s put this into practice. Imagine you’re about to start a beautiful tapestry picture. You’ve picked your pattern, understood the symbols, and are ready to dive in.
Remember, each stitch is a step on your journey. When you change the colours of the yarn as the pattern tells you to, it's like you're painting with yarn. Your needle is like a brush, and the tapestry technique is like your palette.
Community and sharing are invaluable. Don’t be shy to show off your finished projects or to seek advice. The community is incredibly supportive and full of people who’ve been exactly where you are now.
And finally, don’t let the fear of making mistakes stop you. Every dropped stitch or wrong colour is a lesson learned, not time wasted. So, grab your hook and yarn, and let’s start ing your tapestry masterpiece.
Unravel the Tapestry Code: Your Next Masterpiece Awaits
You’ve got this. With a hook in hand and yarn at your side, you're ready to turn bewildering patterns into breathtaking tapestries.
Imagine the pride as you weave your own stories into every stitch, transforming yarn into art that speaks of your journey. This isn’t just about following patterns; it’s about crafting legacies.
Prepare your tools and take on the challenge. Look at each loop as a step closer to mastering the art that once seemed confusing. Ready to stitch your way into the tapestry hall of fame?
Let’s make your first or next project not just a craft, but a masterpiece. Start your dream tapestry today with one of our kits!
Glossary of Tapestry Terms: A Quick Reference Guide
-
Regular Single (RSC): Basic stitching involves a few simple steps. First, insert the hook into the stitch. Next, wrap the yarn around the hook.
- Next, use the hook to pull the yarn through the stitch, forming a loop.
- After that, wrap the yarn around the hook again. Finally, pull the yarn through both loops on the hook.
-
Double (DC): To make a taller stitch than the single, you'll need to:
- Wrap the yarn around the hook.
- Insert the hook into the next stitch.
- Wrap the yarn around the hook again.
- Pull the yarn through the stitch.
- Wrap the yarn around the hook one more time.
- Pull the yarn through both loops on the hook.
- Wrap the yarn around the hook again.
- Pull the yarn through the remaining two loops on the hook.
- Wrong Side (WS): The back of your work, typically less visually appealing than the front or the side not intended to be displayed.
- Working in Rows: Create the fabric by turning the work at the end of each row and starting a new row in the opposite direction.
- Colour in Tapestry: The method of using multiple colours within the same row or round to create patterns. Or, images in the fabric is known as tapestry.
- Tapestry Technique: This is a technique where you use a basic stitch, usually the single, to create patterns or pictures in the fabric. You do this by working with different colours of yarn.
- Loops on the Hook: Refers to the loops of yarn that are on the hook at any given time during the process of making a stitch.
- Left Handed: Refers to adapting techniques for those who with their left hand as the dominant.
- Sides of the Work: This refers to the front (the side intended to be displayed or is visually appealing) and the back (wrong side) of the work.
- Inserting the Hook: The act of inserting the hook into a stitch or space in the fabric to draw through yarn for creating stitches.
- Reading Tapestry: The skill of understanding and following a tapestry pattern or chart to create a design.
- Tapestry Patterns: Written or charted instructions for creating a tapestry project, including symbols and colours to be used.
- Tapestry Chart: A graphical representation of a tapestry pattern, using symbols to denote stitches and colour changes.
- Front of Your Work: The side of the work that's intended to be displayed or is visually appealing.
- Turn Your Work: The action of turning the project around to start a new row or round from the opposite side.
Recommended Resources
Websites
- Ravelry (www.ravelry.com): A massive community of stitchers and knitters with a wealth of patterns, including many for tapestry. It's a great place to ask questions and share your projects.
- Tapestry (www.tapestry.com): A website dedicated to tapestry, offering free patterns, tutorials, and inspiration.
Communities
- Online Forums: Platforms like Reddit have active communities (e.g., r/) where you can find support, advice, and inspiration from fellow stitchers around the world.
- Social Media Groups: Facebook and Instagram have many groups and hashtags dedicated to and tapestry. Search for #tapestry or #community to find a group that fits your interests and level of expertise.
These resources are a starting point for anyone looking to dive deeper into tapestry. Whether you’re looking for patterns, seeking advice, or just wanting to connect with fellow enthusiasts, there’s a wealth of information and support available. Happy stitching!
Your Tapestry Crochet Compass: Navigating the Stitches and Patterns
What type of stitches do you use for the Brigantia tapestry kits?
In our Brigantia tapestry kits, you'll master the cross stitch and tent stitch. These stitches are the heartbeat of our designs, adding depth and detail to each piece.
Which needle sizes do I need for your tapestry kits?
For our tapestry kits, you'll need needles in sizes 13, 16, and 18. These sizes are perfect for weaving the magic into your tapestry projects, making sure every stitch is a pleasure to make.
Do you turn your work when doing tapestry crochet?
Absolutely! Turning your work is key in tapestry crochet, making sure your masterpiece has that seamless, intricate look from all angles.
Is tapestry and mosaic crochet the same?
Not quite twins but close relatives. Tapestry crochet weaves colours in each stitch, while mosaic crochet uses dropped stitches for a tiled effect.
How do you read crochet grids?
Think of crochet grids as treasure maps. Each symbol marks a stitch type; follow them row by row, and you'll unlock the pattern's secrets.
What is the right side and wrong side in tapestry crochet?
The right side is your showcase side, smooth and patterned. The wrong side hides your yarn trails, keeping the magic of the pattern intact.
What is the best stitch for tapestry crochet?
The single crochet reigns supreme in tapestry crochet for its tight, detailed fabric that’s perfect for showcasing patterns.
How do you make a tapestry look better in crochet?
Keep your stitches tight and even, master colour changes, and choose your yarn colours wisely to make your tapestry pop.
What kind of yarn do you use for tapestry crochet?
Opt for yarns that are smooth, sturdy, and not too slippery. Cotton or acrylic yarns in various colours will bring your patterns to life.
What is tapestry crochet used for?
From cosy blankets to chic bags, tapestry crochet breathes life into everyday items with vibrant patterns and textures.
What size yarn do I need for a tapestry crochet?
Choose yarn size based on your project's needs. Thinner yarns for finer details and thicker yarns for bold, chunky patterns.
How do you read a crochet tapestry graph?
A crochet tapestry graph is like a pixel art grid; each square represents a stitch in colour. Follow the grid, and watch your pattern emerge.
How do you read crochet diagrams UK?
Crochet diagrams in the UK use standard symbols for stitches. Just remember, terms might differ slightly from US patterns, so keep a conversion chart handy.
Is it easy to read crochet patterns?
With practice, yes. It may seem like decoding ancient hieroglyphs at first, but soon you’ll be fluent in the language of crochet.
How do you hide yarn in a tapestry crochet?
Weave your yarn ends in as you go or crochet over them, keeping the inside of your work as tidy as the outside.
How do you keep a tapestry from slanting in crochet?
Use a smaller hook size to tighten your stitches, or try the tapestry crochet technique, which naturally minimises slanting.
What does RS mean in crochet?
RS stands for “right side,” indicating the front or public-facing side of your work, where all the pattern magic happens.
Do you always turn your work in crochet?
Mostly, yes. Turning makes sure your stitches are uniform and your pattern develops correctly, especially in projects worked in rows.
Do you crochet into the turning stitch?
Yes, crocheting into the turning stitch helps to maintain the edge’s shape and prevents your work from narrowing.
Do you have to flip crochet?
Flipping your work isn't mandatory but is often done to manage the yarn more easily and to work on the next row from the right side.
Should I turn my crochet inside out?
If the wrong side looks better to you, absolutely. Crochet is an art, and how you present it's entirely up to your creative vision.