
Tapestry Kits for Beginners: Get Into This Amazing Hobby
If you are looking for a new hobby, but have not found anything that really clicks with you, tapestry may be the perfect pastime for you. This craft has been around since ancient times and is still popular today because it is so easy to learn and rewarding at the same time.
There are so many styles and designs available that there will definitely be something for everyone! Even better: tapestry kits for beginners are readily available online, so if this sounds like something you want to try, read on.
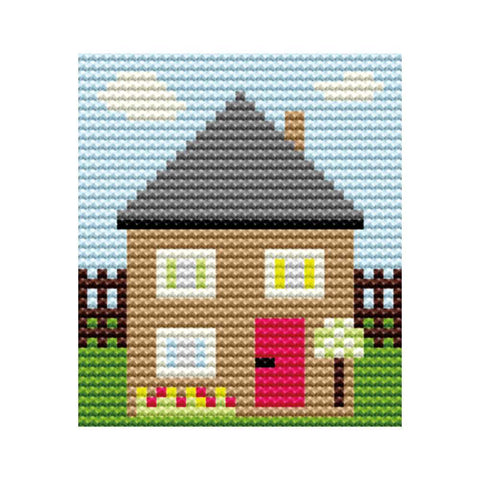
A tapestry kit for beginners is an amazing way to get into this craft
Tapestry kits for beginners are a great way to start with tapestry. This relaxing hobby is perfect for anyone who wants to create beautiful pieces of art that can be hung indefinitely in their home! You can also stitch tapestry onto bags, pillows, and blankets.
How do I know if a tapestry kit is right for me?
You will want to find one with many colours and designs, so that you have options for your finished piece. Also, make sure the kit contains everything you need, which could include tapestry wool, needles, a printed canvas, a frame, and instructions for completing the project.
Decide which style and design of tapestry you want to complete
The first step is to decide which style and design of tapestry you want to complete. And then choose the right kit so you can be sure everything is included. There are many types of kits available, some with instructions, others without.
If you choose a kit with instructions, make sure they are easy to understand and follow, so that they do not confuse or frustrate you once you get started. Remember that this craft is not meant to be difficult; even if it looks complicated, there is no reason why anyone can't do it!
Make sure the kit has all the things you need
This includes needles, threads of all the colours you'll need, a hoop to work on, and a detailed pattern.
When you learn tapestry, it is important to make sure the kit contains everything you need. The following items are crucial:
- Needles - The correct size must be selected for both the thread and the fabric being used. If a needle is too small for the thread, it will have trouble going through it, causing great frustration and wasted time. On the other hand, if too large a needle is used on fine fabric or delicate threads, they will break easily. In addition, tapestry needles should always be sharp, otherwise, they cannot penetrate through thick material as easily or quickly as dull ones.
- Threads - You want enough thread in each colour, so you don't waste weaving it through your canvas with your needle! If working on a part of your piece, try to match colours so that each thread goes back to its container. This will prevent confusion later.
- Instructions - It’s important to know where to start with your kit. Check for detailed instructions in your kit.
- Canvas - Your kit should include a colour-printed canvas with the pattern of your design on it.
When you have chosen the ideal tapestry kit for beginners, it is time to start stitching!
Practice stitching with tapestry slip knots. Work from left to right and from bottom to top. This gives your finished piece an even look when you're done!
Like any new skill, tapestry can seem daunting at first
But don't worry. It's easy to learn! And once you get the hang of it, it is a great way to relax and express yourself. It's also a fun way to spend time with family and friends!
Tapestry is a fantastic hobby for beginners, because there are so many ways to make beautiful works of art that tell your story and inspire others.
You can make a tapestry cushion, rugs, a tea cosy, wall hangings, and much more with tapestry starter kits.
It is worth taking your time and practice before diving into your finished piece
The best way to make your first tapestry is not to rush. Take your time and practice, but don't be afraid to make mistakes. If you take too long, you may miss a great opportunity. But if you rush, you may end up in disaster with no second chance at the project.
When working with roving wool, it's better to use a felting needle instead of regular sewing needles. Felting needles have longer shafts that make it easier to colour in your design and are easier on the eyes. It is also important to take breaks while working, so as not to tire yourself (or get bored).
If that's all new information, don't worry! Keep in mind that there is no correct or incorrect approach to this matter.
If you are ready to start your project, there are some helpful tips to make sure your stitches are secure
Once you have chosen a kit, it's time to start!
If you are ready to start your project, there are some helpful tips to make sure your stitches are secure:
- Make sure you use the right size needle for the thread you use. If a needle is too small or large, it is hard to sew and can cause damage. If a needle is too big, it bends and breaks under pressure.
- Make sure your needle is sharp; dull needles can in some cases cause uneven stitching and even breakage.
- Make sure the thread is the correct size for the needle. If you don't do this step correctly, there could be gaps between the stitches. You could also damage the sewing machine if you try to push thick material with thin thread (or vice versa). You may want another pair of hands nearby if you try this new skill for yourself.
You can also use a tapestry slip knot instead of a regular knot to provide, and, and extra security
A slip knot is a small loop of yarn placed on the hook before you begin to crochet. This will help you avoid the stitches falling off your hook when crocheting, which can be frustrating!
To make a slip knot, take the tail end of your yarn and wrap it around your finger twice (or even if it fits comfortably many times). Then take the working end of the yarn and pass it through these loops around your finger. Pull tight!
Finally, remember that when making satin stitches…
…it is always easier to work from left to right and from bottom to top
It is the easiest way to work, because the thread goes smoothly and smoothly. And it is more efficient, because you don't have to go back to the same place again.
Once you have stitched all cross stitches in one colour…
…it is time to secure them with the back stitch
Once you have stitched all the cross stitches in one colour, it is time to secure them with the back stitch. The back stitch is a very simple stitch to secure the cross stitches. It consists of three small diagonal stitches made over each cross stitch.
Do not worry if you make mistakes or find yourself frustrated…
…this is part of the learning process
Do not be afraid to make mistakes. This is one of the most important parts of learning tapestry weaving: experimentation and mistakes are part of the process, so don't try to avoid them at all costs!
If you are struggling with a particular technique or design, ask someone who has already mastered it. Or try to search online for resources that can teach you how to do it correctly.
If your project does not work as well as you hoped, that does not mean it is a waste of time. But use this opportunity to learn from your mistake and apply these lessons in future tapestries!
It may also be worth asking yourself if there are ways to improve this particular piece before starting again (such as changing colours or stitches).
Tapestry kits are a great idea for anyone who wants to start this amazing hobby!
Beginners tapestry kits are a great way to get involved, learn and enjoy this craft. Tapestry kits are a great way to get into this craft, learn it and enjoy it. Tapestry kits are a great idea for anyone who wants to start this amazing hobby. A kit is perfect for beginner stitchers.
Wrapping It Up
Now that you know how easy it is to start with a printed tapestry kit, what do you wait for? Get yourself some stitch kits and begin stitching!
Stitch by Stitch: Unravelling the Mysteries of Tapestry and Needlepoint
What is the difference between tapestry and needlepoint?
Tapestry and needlepoint often get lumped together, but they're like cousins in the crafting world—related but with their own unique traits. Tapestry is a form of textile art, traditionally woven by hand on a loom. It's all about creating a picture or design directly within the weave itself, kind of like painting with threads. Imagine weaving stories and landscapes thread by thread, where the entire fabric forms the artwork.
Needlepoint, on the other hand, is more like drawing on a pre-existing canvas. It involves using a needle and thread (usually yarn) to stitch designs onto a stiff canvas. Think of it as colouring within the lines, where the canvas comes pre-marked, and your job is to fill it in with stitches, typically using a simple half-cross, tent, or continental stitch.
So, while tapestry is woven, creating both the image and the fabric simultaneously, needlepoint is stitched, applying yarn to a canvas to create the design. Each has its charm, offering a different kind of satisfaction and end result. Whether you're weaving a tale on a loom or stitching a story on canvas, both crafts invite creativity and a deep dive into the world of textiles.
Where should you start a tapestry?
Begin at the heart of your tapestry. Starting in the centre of your printed canvas wool design ensures an even spread of your artwork, keeping the balance and beauty intact as your creation grows outward.
Is cross stitch the same as tapestry?
Cross stitch kits use x-shaped stitches on a grid-like fabric to form a picture, while tapestry is woven on a loom, intertwining threads to create the image. They share creative spirits but tell their stories in different languages.
What are the basic tapestry stitches?
The backbone of tapestry includes the half cross stitch, tent stitch, and sometimes the continental stitch. Each stitch is like a pixel, contributing to the grand view of your masterpiece.
Why is needlepoint so expensive?
Needlepoint can be a bit of a splurge due to its high-quality materials like Cleopatra's needle or William Morris designs, and the time-intensive process to create each needlepoint kit. It's the difference between a bespoke suit and off-the-rack attire.
Is needlepoint easier than embroidery?
Needlepoint, with its straightforward stitches on a sturdy canvas, can be more beginner-friendly than embroidery, which dances across fabrics with a variety of stitches and techniques. It's like comparing a walk in the park to a dance marathon.
How to do tapestry for beginners step by step?
- Choose a simple needlepoint kit with a printed canvas wool design.
- Set up your workspace with good lighting and a comfortable seat.
- Begin stitching from the centre, following the pattern with basic stitches.
- Enjoy the process as your tapestry takes shape, stitch by stitch.
Do you need a frame to do tapestry?
While not strictly necessary, a frame can keep your work taut and even, making the stitching smoother. It's like having a roadmap in a foreign city – not essential, but definitely helpful.
Is it hard to learn tapestry?
Learning tapestry can be as challenging as you make it. Starting with simpler designs and basic stitches, anyone can embark on this creative journey. It's like learning to cook; start with simple recipes before attempting the soufflé.
How long does it take to make a tapestry?
The time it takes to complete a tapestry can vary widely, from a few weeks to several months, depending on the complexity of the design and your stitching speed. It's a marathon, not a sprint, so enjoy each stitch.
What's easier cross stitch or embroidery?
Cross stitch, with its straightforward, grid-based patterns, often comes across as easier to grasp for beginners than the freeform nature of embroidery. It's like comparing checkers to chess – both have their intricacies, but one is more accessible to start.
Can you use cross stitch patterns for tapestry?
Yes, you can adapt cross stitch patterns for tapestry, especially when using tent stitches on a needlepoint canvas. It's a bit like translating a favourite recipe to suit a different diet.
What stitch is best for tapestry?
The tent stitch reigns supreme in tapestry for its versatility and coverage, making it the go-to for many projects. It's the bread and butter of tapestry stitches.
How do you follow a tapestry pattern?
Following a tapestry pattern is like reading a map, with each colour and symbol guiding you to create the image. Start from the centre, and let the pattern lead you through the tapestry landscape.
How do I choose a tapestry needle?
Choose a needle that comfortably fits the yarn you're using and slides easily through your canvas. It should be a trusty companion, neither too large to distort the canvas nor too small to handle the yarn.
What makes a tapestry a tapestry?
Its creation process – woven by hand or loom defines a tapestry, intertwining threads to form a complete image or design. It's a blend of art and storytelling through threads.
What is the difference between needlepoint and embroidery?
Needlepoint focuses on covering a canvas with stitches, often using a rigid framework, while embroidery is the art of embellishing fabric with needle and thread in a freer form. It's the structured vs. the free spirit.
What's the difference between tapestry and embroidery?
While tapestry is woven on a loom, building the fabric and image together, embroidery adds decorative stitches to existing fabric. It's the difference between building a house and painting it.
Are tapestry needles the same as cross stitch needles?
Tapestry needles, with their blunt tips, are designed to glide through canvas without splitting threads, making them ideal for needlepoint kits tapestry. Cross stitch needles, slightly sharper, are meant for piercing closely woven fabrics. Each serves its purpose in the crafting toolkit.